Saturday, August 11, 2012

DIY large scale faux frame for stretched canvas

I've been wanting to attempt this project for awhile. I paint on a the side (just for fun) and have a large number of unframed stretched canvas paintings. Two in particular were in my living room and their lack of frame has been bothering me for months.  I've already spent literally hundreds of dollars this year framing artwork that my husband and I got on our honeymoon.  Even with the 1/2 of framing at Hobby Lobby and Michael's, it can get expensive to get a big frame for artwork.  So I came up with this idea. I didn't know if it would work or not, but today I went to Home Depot, gathered the supplies, and gave it a shot.  I'm very pleased with the results, though there are a few kinks to work out.

Here are the unframed paintings.  Pretty blah.


Ok, So then I picked up some supplies from home depot.  I had them cut some lightweight board to fit the size I wanted.  One of the paintings is 30x40 and the other is 36x48.  I decided it would be easiest to make a 5 inch frame, so I had the man cut the boards to 40x50 inches for the smaller painting and 46x58 inches for the larger painting.  I also picked up some door molding which is about $1.15 per foot.  I had them cut that into smaller pieces because the large pieces were 14 feet long. I also purchased some screws (about 1 inch long), hanging wire, adhesive for the wood, plastic drop cloth, cheap paint brushes, spray paint, and decorative wood embellishments for the corners of the frames (so as to avoid having to cut precise 45 degree angles).  I purchased some fabric and Modge Podge (mat) from Hobby Lobby as well. You may or may not need this depending on your preference (see below). You could use paint instead, but I really liked the effect.

drop cloth, screws, paint brushes, contact cement, spray paint, and wooden embellishments.
door molding.

Next you will want to place the embellishments on the corners of the board, and mark where you need to cut the door molding (if it was not already cut to size). Make sure to place all the pieces on the board to make sure they line up appropriately. 

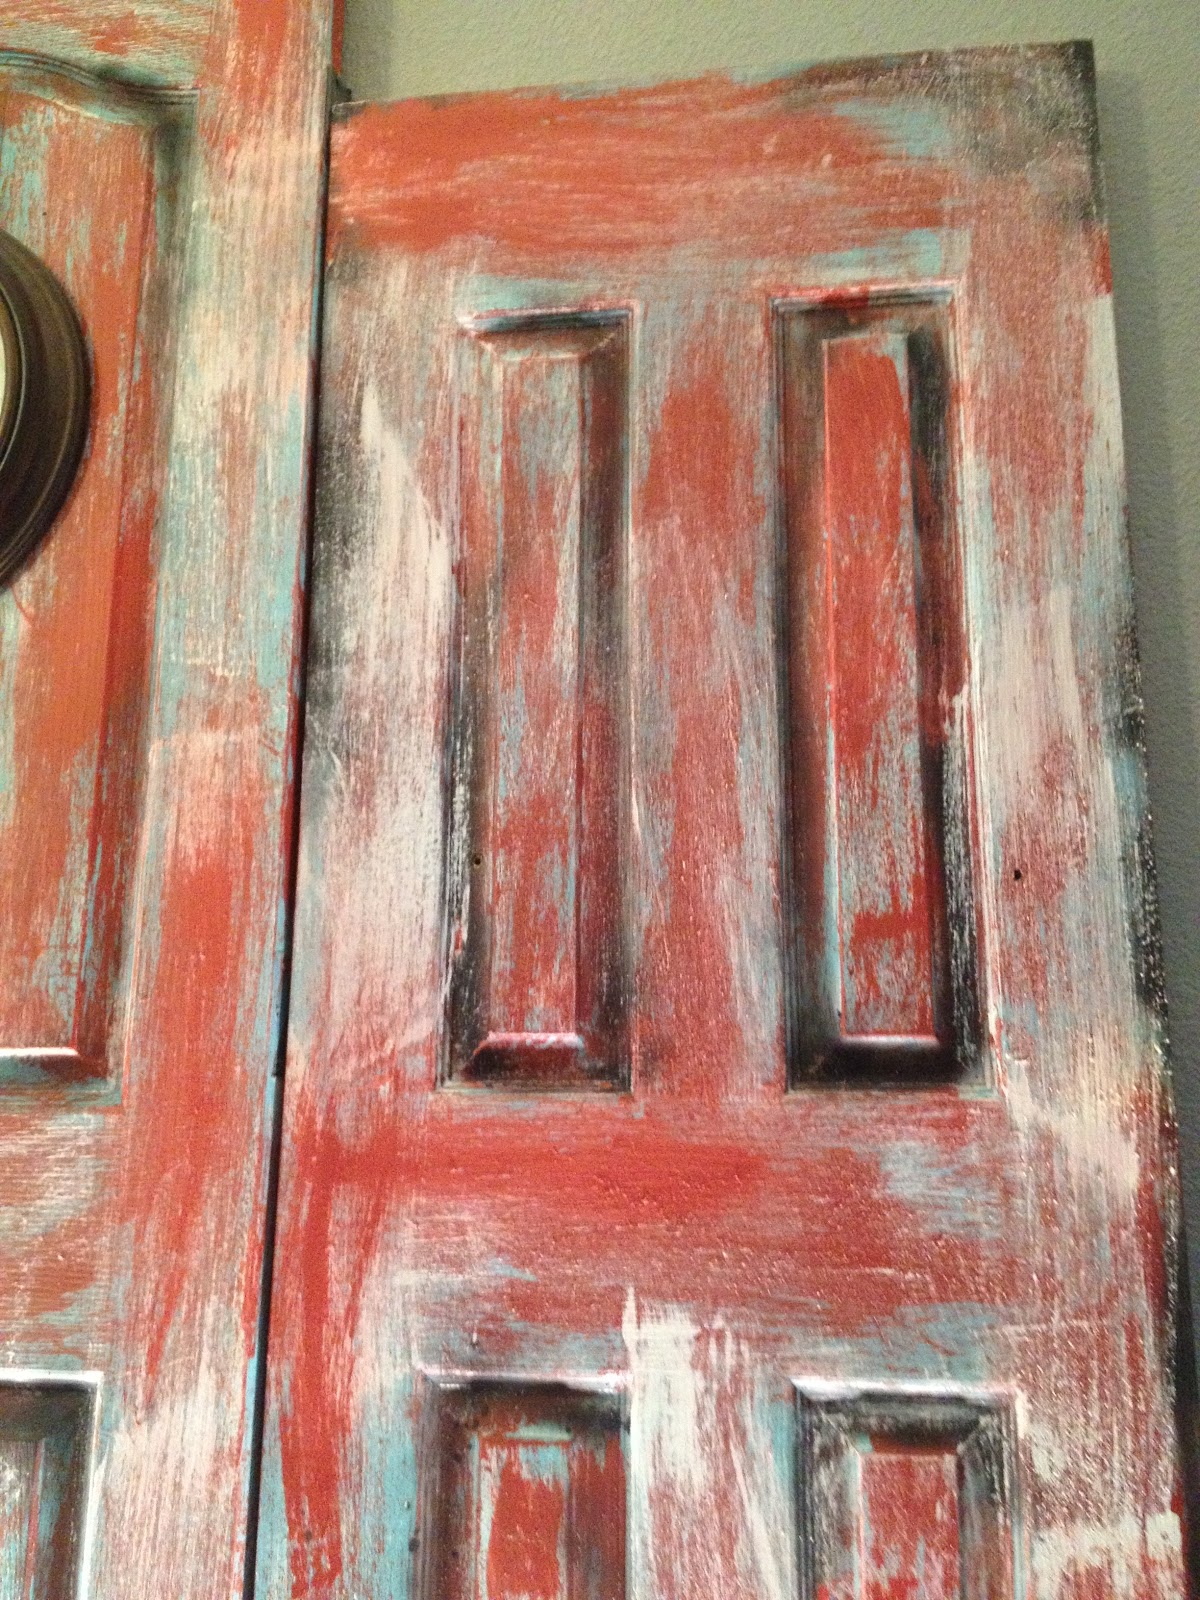
Then lay out all the pieces on your drop cloth and spray them ( or paint them with regular paint) whatever color you want. I did two coats. Don't forget the long edges.


Next I cut strips of fabric to place where the wood would be exposed once the molding and painting is in place.  I chose to do it this way so that I wouldn't have to buy so much fabric. I used a small subtle pattern which looks like a solid from far away.  This is the part where you could use paint or decorative paper, or whatever you want.  Then I put matte Modge Podge under and over the fabric, careful to work out all the wrinkles.  


Next lay the dried molding on the edges to make sure you don't need to add anymore strips of fabric.  If it is a good fit.  Place the painting on it as well to make sure the inner margins are good. 


Then use the contact cement to glue the molding and embellishment pieces in place.  Here is where I would have changed what I did - get some clothes pins to help keep the molding in place as it dries.  I used free weights and other heavy things to help with this because I didn't have any clothes pins.  Also - make sure your board is the straightest one available.  Otherwise, it is really hard to get the molding to stick as it is not flexible and does not want to bend with the board.


When that is dry ( I'd give it at least 24 hours with the weights/clothespins).  I didn't have the patience to wait this long and I had to re-glue.  Just don't do it.  Anyway, carefully stand up the frame and measure the desired distance to place the screws into the back.  I did 5 1/2 inches down  and towards the middle because I used the screw that was then pointing through to the front of the frame to hold on the actual canvas.  


Then attach hanging wire and make sure the wire measures so that if it is pulled taught in the middle as if it were hanging, the wire doesn't stick up over the frame. 


Then flip the frame over and carefully place the canvas where it needs to be positioned. Measure all the way around to make sure the painting is centered. If you placed your screws correctly, the pointy end should be positioned so that the wood of the canvas will be over the screw tips.  Then use a mallet (or anything blunt that won't damage the canvas) to hammer the canvas into the screw tips.  This is all you need to hold the canvas up.  Lastly, after this, make sure to paint the sides of the big board so that it is not still wood color.  


I made two giant frames.  Or faux frames, I guess.  Each cost less than $50, and I still have extra molding that I can take back to Home Depot.  The difference in the living room is drastic.  I think I will keep using this technique in the future. 

Here are some comparison shots of before and after. 


That's all for today.


Thursday, August 9, 2012

Hola! Welcome to my new blog!

I'm not sure how to start this whole "blogging" thing, but I have been wanting to do this for awhile.  I feel like I have tons of creative projects and ideas that I can share. Also, I'm an army wife.  Now, while I expected that I would have to face time without my husband during deployments, what I did not sign up for or expect was that even when they are home for a year and a half between deployments (only a year and a half between 9 month and 1 year deployments!) ... they aren't actually home all the time.  My husband is currently on a month long training exercise, this is probably the 3rd or 4th time he has had to leave.  While I should be grateful that I don't have to worry about him the way that I do when he is overseas, I can't help but feel selfish and slightly irked.  I just want him home.  (Sorry about the complaining, I needed to vent about that for a second). The plus side? Lots of time for projects... sort of... I am also a veterinarian full time.  I still find some time to get creative at home, and so can you!

Here is one of my original projects.  My husband and I purchased our first home this year.  In haste, we bought a brand new home that was not entirely to our liking. We promptly ripped out all the carpet (which was brand new - yea I know we are crazy), and put down our own hardwood floors.  We also knocked down some walls to expand the loft area into a 4th bedroom that we didn't need to make a very large entertainment area (or as my husband likes to call it - his "man room").  We also built a wall to expand our kitchen and installed cabinets and counters.  Let's just say that if we can feasibly do it ourselves, we aren't hiring anyone else to do it for us.  It has been quite an adventure.

Anyway - back to the point.  For this "man room," we needed an area to display bottles, glasses, etc. We wanted a rustic type theme for the room and we had a bunch of pallets sitting outdoors.  Pallet projects seem to be all the rave, so I made my own.

While I didn't have the foresight to do a step by step photo set. The project was very simple.  

1.  Orient the pallet the way that you want it. All pallets are different so find one that has the wood panels spaced the way that you prefer for your purposes, that way you don't have to do any cutting or nailing to do. 
2. I used a dark wood stain and an old cloth and I rubbed the stain all over the pallet. I did not paint it and I was not going for full coverage. You can see areas where the stain is not quite even giving it an aged appearance.
3.  The last step: For the lighting, I used rope lights and placed them so that they were positioned down the slats in the back.  I used nails and bent them with a hammer so that they curved over the rope without piercing it.  Aaaannnnd.....that is it! Simple!

Here it is hung on the wall.


Some detail shots.


A second project for the same room was turning three doors that I had laying around into a background for our bar. Two of the doors were closet doors and one was a door to a room. My husband knocked down the walls of the former bedroom to which these doors belonged to expand the upstairs loft for the "man room."  


Basically I took plain white doors and painted them a base color unevenly (I chose blue), I then went over this with a red color I had laying around, the brush I used was old and therefore made very uneven strokes.  I did the same with white in certain areas.  Lastly, I took some spray paint and darkened some of the already existent grooves of the doors.  I did all 3 doors in less than 1 hour.


I added lighting to the doors by simply attaching a clip on desk lamp ($9.97 at Walmart).  To the bottom of each of the doors. I tucked the cords behind to doors to hide them.  Here is a close up of the light.

So, that's it for today.  You really can create a cool space on a small budget.